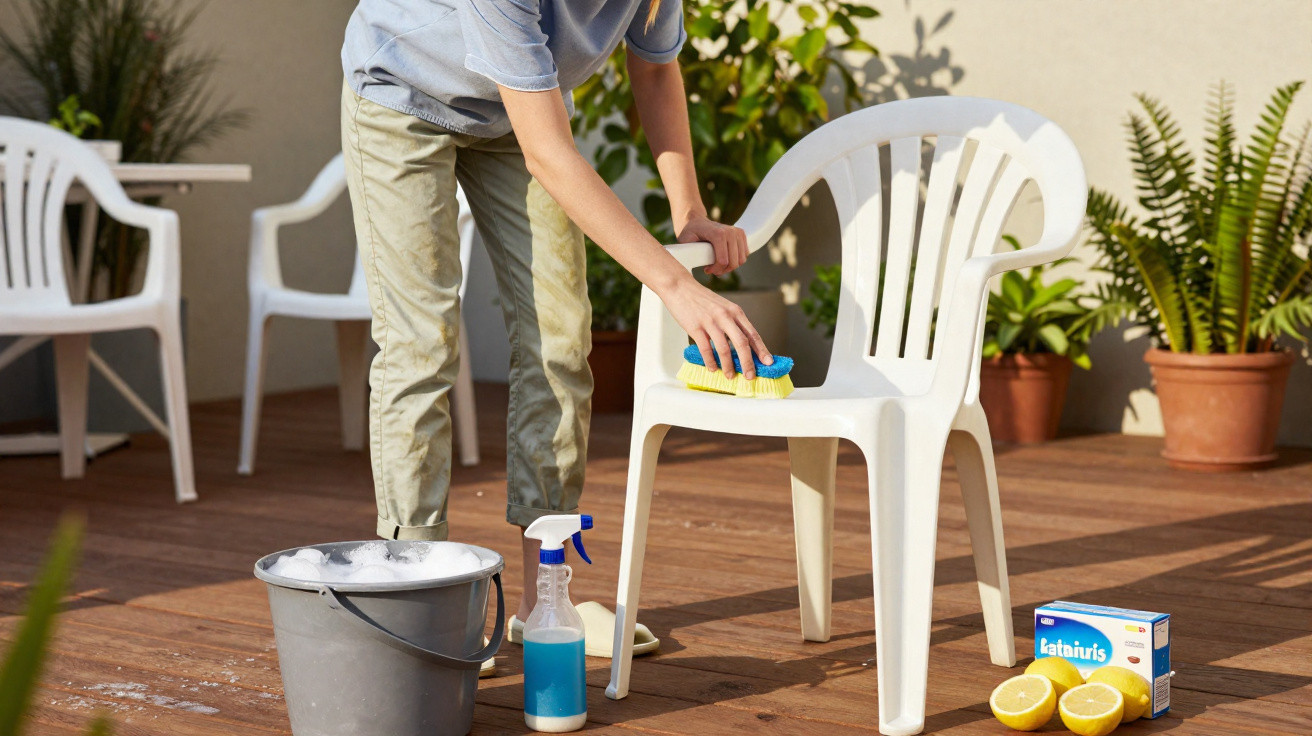
Many people immediately think of the tip or a replacement set from the DIY shop. Yet yellowed or greyed plastic can often be restored surprisingly well with a simple kitchen household remedy – without specialist cleaners or expensive miracle products advertised on television.
Why plastic garden furniture quickly turns yellow and grey
Plastic garden furniture is usually the first to sit in full sun, so it takes the brunt of UV radiation, rain, pollen, dust and changing temperatures. All of these factors attack its surface. Over time, the plastic becomes more porous and rougher, making it more likely to hold on to dirt.
Pale and white furniture in particular can quickly develop a yellowish tinge. After a few summers, coloured chairs and tables may look faded and patchy. This is often because the material has insufficient UV protection, or because the colourant is only on the surface rather than incorporated throughout the plastic.
Other materials age too, although in different ways: metal can rust, wood turns grey and needs oil and maintenance, while polyrattan suffers in persistent rain. Plain plastic, however, has one distinct advantage: provided it is not broken or deeply cracked, it can usually be refreshed remarkably well.
“Many greyed plastic chairs look ready for the rubbish – but in reality, the problem is often just a dirty, weathered surface.”
The two-step method: clean thoroughly first, then let the household mix work
Before applying any special mixture, the garden set needs a proper initial clean. Remove cobwebs, leaves and loose dust first; otherwise, the brush will simply move the grime around.
Step 1: Initial cleaning with warm soapy water
For the first stage, all you need is a bucket, some washing-up liquid and a soft cloth or sponge:
- Use a hand brush or clean broom to clear away cobwebs and loose dust.
- Fill a bucket with warm water and add a squirt of washing-up liquid.
- Wipe down the chairs and table generously, remembering the undersides and backs of the chairs.
- Rinse with clean water so that no soapy residue remains.
This first clean will usually make the set look better straight away, although the grey film often remains. That is where the second stage comes in.
Step 2: Kitchen mix for yellowing and grey film
The real improvement comes from a blend of lukewarm water, clear household vinegar and bicarbonate of soda or baking powder. This combination loosens organic residue, neutralises mild discolouration and removes the dull film from the plastic.
For a standard spray bottle, use the following mixture:
- approx. 500 ml lukewarm water
- 1 tablespoon clear household vinegar
- 2 tablespoons bicarbonate of soda or classic bicarbonate of soda powder
- a small squirt of washing-up liquid to improve coverage
Apply the mixture as follows:
- Pour the mixture into a spray bottle and shake it well.
- Spray generously over the dry, pre-cleaned surfaces.
- Work it in using a soft sponge or microfibre cloth in circular movements.
- Leave it to work for a few minutes, but do not allow it to dry completely.
- Rinse thoroughly with plenty of clean water.
Even after the first application, the plastic will often look noticeably fresher and more even. For heavily yellowed furniture, it may be worth repeating the process.
What to do about particularly stubborn stains
Some marks are especially difficult to remove, including dark scuff marks, old flower stains and baked-on barbecue grease. In these cases, more powerful but targeted products can help.
Cleaning white plastic furniture
White chairs and tables can often be treated with a mineral-based cleaning paste, commonly sold as a “cleaning stone” or “cleaning disc”. These pastes usually contain finely ground minerals, a little soap and glycerine.
How to use it:
- Pick up a small amount of paste with a slightly damp sponge.
- Rub it gently over the stain without pressing too hard.
- Rinse with water and check whether the surface now looks even.
The benefit is that the micro-particles provide light polishing action without immediately leaving deep scratches. On purely decorative surfaces, this can create an almost “like new” result.
Take care with coloured furniture
A more cautious approach is needed with coloured plastic. Abrasive cleaners or rough sponges can damage the surface or wash out the colour. If you still choose to use a paste, always test it first in an inconspicuous place, such as underneath the seat.
Repair or rubbish? When restoring plastic garden furniture is still worthwhile
Before spending hours cleaning, it is worth assessing the condition of the furniture carefully:
- Hairline cracks in load-bearing parts: Fine cracks in the seat or backrest are a safety risk. It is better to dispose of the item.
- Clearly warped chair legs: If a chair wobbles or bends significantly, cleaning will no longer solve the problem.
- Purely cosmetic problems: Scratches, stains and dull surfaces usually make restoration worthwhile.
If furniture is visually worn but still stable, light sanding can help. Fine sandpaper, with a grit of 120 or higher, can smooth rough areas. Afterwards, use a specialist plastic paint suitable for outdoor use.
Spray paints designed to adhere directly to plastic create a fresh, uniform coating. A dust-free, low-wind setting is important, as is applying several thin coats rather than one thick one. This reduces drips and helps the new finish last longer.
“As long as nothing is broken, many ‘ugly’ plastic chairs are really only a good clean and perhaps a coat of paint away from a second life.”
How to protect your refreshed garden set for the long term
Once the restoration work is complete, the next question is how to keep the set looking good for longer without needing a major clean every spring.
- Check for UV protection when buying: Many manufacturers state whether the material has been stabilised against intense sunlight.
- Store it away in winter: Ideally, move the set into a cellar, garage or garden shed.
- Use a protective cover: If storage space is limited, cover the table and chairs with breathable covers.
- Do not use cooking oil: Although oil may make plastic shine briefly, it can leave marks over time and make the surface more prone to attracting dirt.
- Carry out regular quick cleans: Wiping it down once a month with warm soapy water prevents stubborn layers from building up.
What really causes yellowing and the grey film
The unattractive film on plastic is rarely just “dirt”. Chemistry is often involved as well: sunlight breaks molecular chains apart, plasticisers migrate to the surface, and fine dust and soot settle on it. Together, these create the typical layer that is difficult to remove.
The kitchen mix of vinegar and bicarbonate of soda primarily helps grease residue, mineral deposits and organic remnants swell and release more easily. Mild discolouration then appears less pronounced because the surface becomes smoother again and reflects light differently.
Practical tip: how to plan the restoration efficiently
Anyone who does not want to spend the entire Saturday cleaning should take a structured approach. One possible routine is:
- Morning: Brush dust from the chairs and table, then complete the initial clean with warm water.
- Immediately afterwards: Spray on the household mix, allow it to work, then rinse it away.
- After drying: Treat stubborn stains selectively with cleaning paste.
- If required: Apply a thin coat of plastic paint the following day.
Doing this thoroughly once can substantially reduce the effort needed in later years. Afterwards, a quick spring wash is often enough to prepare the set before barbecue season begins.
Many households automatically replace plastic furniture as soon as the first signs of yellowing appear. But a look at the chemistry behind it, together with a bucket of kitchen ingredients, shows that what seems destined for the tip is very often still a perfectly usable garden set that can look tidy again with little money and some time.









Comments
No comments yet. Be the first to comment!
Leave a Comment