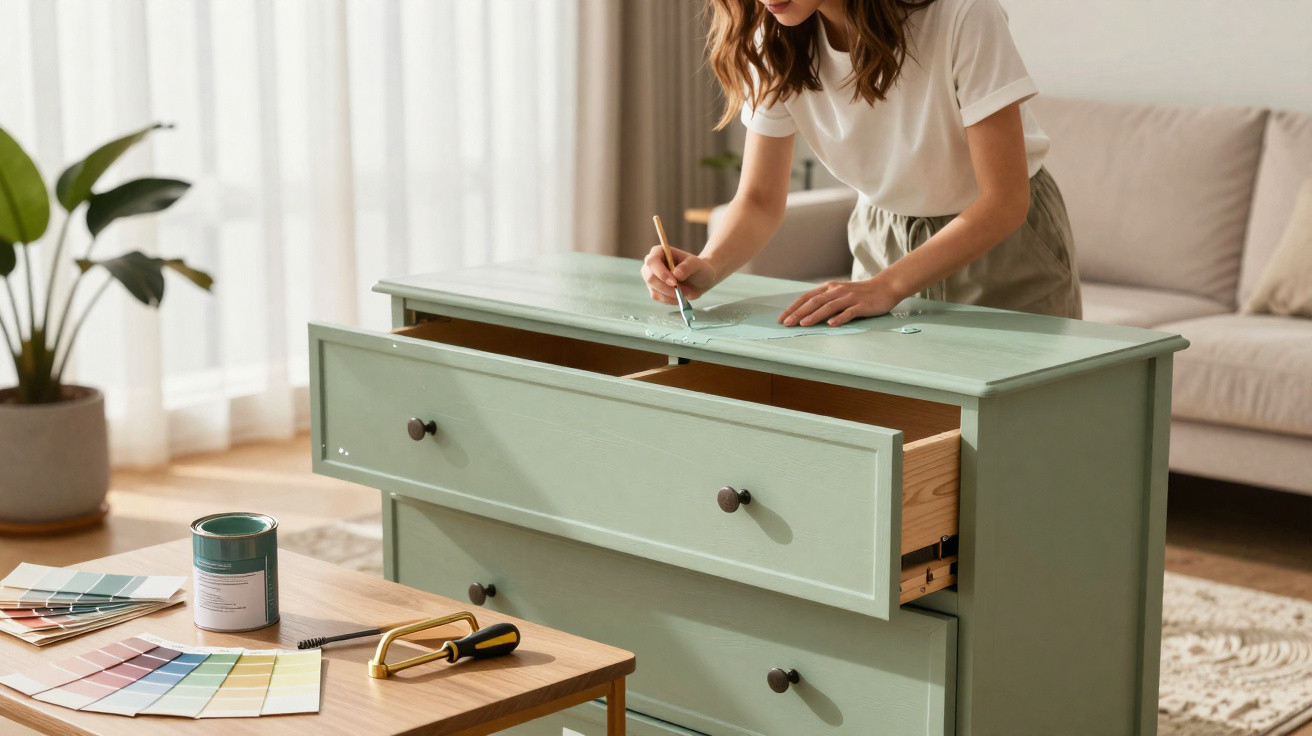
Many people will recognise the dilemma: an old family sideboard, a carved wardrobe unit or a solid chest of drawers occupies a great deal of space, holds sentimental value, yet no longer suits their own interior style at all. Rather than reluctantly throwing the piece away or leaving it to gather dust in the cellar, a straightforward step-by-step approach can give it a surprisingly fresh design at home, using little money and only a few tools.
Why keep old furniture instead of buying new?
Restyling an inherited piece of furniture does more than save money: it also conserves resources. An old cabinet avoids ending up with bulky waste and remains useful, simply with a far more contemporary appearance. Depending on the furniture's size and condition, many projects can be completed for just £30 to £100.
- No major conversion is needed, and the work can be done in an ordinary home.
- The budget is generally lower than the cost of a basic new piece of furniture.
- Memories and family history remain part of everyday life.
- Solid wood is often more durable than today's cheaply made furniture.
There is also an emotional aspect. A grandparents' display cabinet or a chest of drawers from a childhood bedroom carries its own stories. Adapting its look to suit your home keeps those stories in the living room rather than sending them to the storage cupboard.
A well-refurbished solid-wood piece of furniture will usually last another five to ten years after repainting before it needs attention again.
This turns an old cabinet from a stopgap into an intentionally designed one-off piece, often with considerably more character than a generic item from a furniture shop.
Preparation: no good result without a thorough base
The real secret to a successful furniture update lies in the preparation. Taking care at this stage prevents problems later on, such as flaking paint or untidy edges.
Clean, dismantle and protect
Before the first brush goes anywhere near the paint, the furniture should be thoroughly degreased. Over the years, old polish residue, grease from hands and dust build up on surfaces, preventing a new paint layer from adhering properly.
- Clean every surface with a suitable cleaner.
- Unscrew handles, knobs and fittings, then store them separately.
- Cover the floor and nearby walls with protective sheeting or newspaper.
- Mask hinges if they are not to be painted over.
If you do not want to create lots of sanding dust for the neighbours' sake, a high-quality primer can greatly reduce the amount of sanding required. It helps later coats of paint cover evenly and remain firmly in place.
Choosing the right primer
An adhesion primer is suitable for painted or very smooth surfaces, while bare wood needs an appropriate wood primer. The important thing is to apply it thinly and evenly: two light coats are preferable to one heavy one. Once dry, the surface should feel slightly rough, which is ideal for applying the paint afterwards.
A carefully applied primer saves hours of sanding and provides the foundation for an even, modern finish.
Colour choices: shades that make old furniture look genuinely modern
Light shades are almost always a good choice when you want a heavy, dark cabinet to appear visually lighter. Off-whites, warm creams and very pale greys can make even substantial furniture feel airy.
Popular options include:
- Off-white for a clean style with a Scandinavian influence.
- Creamy tones with a hint of beige for a warm feel at home.
- Soft greige, a blend of grey and beige, for modern minimalists.
- Deep midnight blue or fir green when the piece is intended to make a statement.
Water-based furniture paint works well for the application. It has a milder smell, dries quickly and can be built up neatly in several thin coats.
Creating a smooth, professional finish
Use a foam roller on large, flat areas. Mouldings, edges and carved details are better handled with a smaller paintbrush. The method is what matters:
- Apply the first coat sparingly, without trying to correct brush or roller marks once the paint has started to set.
- Allow it to dry fully before adding the next coat.
- Two to three thin coats give a better result than one thick layer.
- Remove small paint drips while they are still fresh, using a lightly dampened cloth and a little solvent.
For doors, one small trick helps: paint them while they are slightly open, then allow them to dry. This prevents them sticking to the cabinet frame later.
Handles, details and protection: the finishing touches for a modern look
Once the paint has dried through, it is time for what may be the most important choice for the furniture's impact in the room: selecting new handles. They largely determine whether the piece looks classic, playful or minimalist.
New handles, a new identity
Many DIY enthusiasts choose matt gold or brass handles because they create an elegant contrast with pale fronts. Handle pulls or knobs in black or an iron-effect finish suit a more industrial look. For a softer feel, leather loops can be used instead of conventional handles.
Simply replacing the fittings is often enough to turn a cabinet nobody liked any more into a favourite piece.
If you would rather retain the old handles, they can be updated with gold, black or copper spray paint. This preserves the original character while giving it a contemporary finish.
Sealing and care
To make the new appearance last, the surface needs suitable protection. A clear acrylic varnish or durable furniture sealant guards against scratches and dirt. In less heavily used areas, a colourless wax or oil treatment may be sufficient and will give the wood a warm tone.
For day-to-day care, a lightly damp cloth is usually all that is needed. Harsh cleaners attack the surface and can make the paint look dull sooner.
Common mistakes – and how to avoid them
Even small projects can become frustrating when a few basic points are overlooked. The most frequent pitfalls are easy to prevent.
- Insufficient cleaning: grease or polish residue beneath the paint causes the finish to peel prematurely.
- Paint layers that are too thick: these create drips and dry unevenly.
- No drying breaks: painting again too soon can tear open the previous layer.
- An unsuitable colour choice: very dark shades on already bulky furniture can make rooms appear smaller.
- Poor lighting while painting: small areas are left uncovered, which often becomes obvious only later.
A simple test is to complete one small, highly visible section after priming, such as a drawer front. If you like the colour effect, continue with the rest. If not, you only need to repaint with a different shade before every surface has been tackled.
How to integrate the new style at home
If you are refurbishing only one piece of furniture, coordinate its colour scheme with other elements in the room. When the cabinet's cream shade appears again in cushions, curtains or a rug, the room immediately feels “perfectly coordinated”.
Some stylish combinations include:
- A light, newly painted sideboard with black handles, paired with black picture frames on the wall.
- A pastel-painted chest of drawers with brass handles and a floor lamp with a brass base.
- A midnight-blue cabinet against a pale-grey wall, complemented by blue accents in the rug.
If you are uncertain, test paint samples directly on the furniture and live with them in the room for a day or two. Daylight, artificial light and the room's size can all significantly alter the impression.
Benefits that go beyond appearance
A refurbished heirloom brings more than a fresh look to the living room; it can also create a sense of identity. Guests ask about the story behind it, while children learn that things need not be thrown away simply because they have gone out of fashion. Anyone who has successfully restyled a larger piece of furniture will often feel confident enough to take on further projects: a coffee table, a bedside cabinet or perhaps even the kitchen.
Step by step, a cabinet that seemed outdated becomes a highly personal design project, requiring manageable effort but making a major difference to both the home and the way it feels to live in.









Comments
No comments yet. Be the first to comment!
Leave a Comment