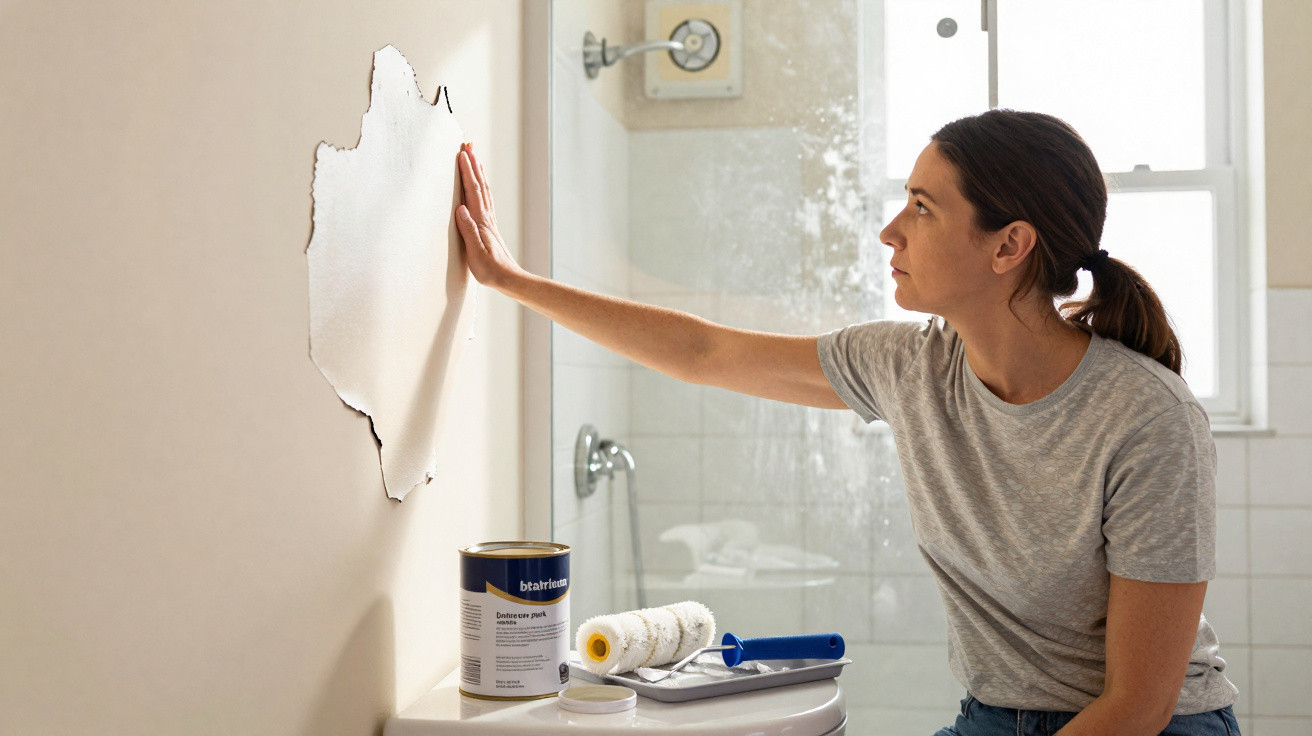
Many DIY enthusiasts know the feeling: spring arrives, they are eager to get started, and the home is meant to look more modern with minimal effort. A tin of paint seems like the easiest answer. The bathroom is often high on the to-do list. But anyone who picks up a brush without thinking it through may face an unpleasant surprise a year later: peeling paint, unsightly bubbles and, in the worst cases, costly remedial work.
When the dream bathroom becomes a visual nightmare
Everything looked perfect at first
The scenario sounds familiar enough: a free weekend, an inexpensive tin of paint from the DIY shop and a little enthusiasm are all it takes to turn an old, yellowed bathroom wall brilliant white again, or give it a stylish pastel finish. The surfaces appear smooth, the paint covers well, and the room seems brighter and more spacious.
For the first few weeks, everything appears to be going exactly as intended. The shower is used, and the refreshed look is pleasing every time. Nothing flakes away, nothing changes colour and there is not a crack in sight. This is precisely when many people become convinced they have done everything correctly.
“First impressions are misleading: in humid rooms, the true nature of wall paint only becomes apparent many months later.”
The real issue lies in a crucial detail: what seemed to be ordinary wall paint was, from the outset, intended only for dry rooms. It may last for years in a living room or bedroom. In a bathroom, however, it has to contend every day with steam, temperature changes and splashing water-and it gradually but inevitably loses that battle.
Bubbles appear after 6 to 18 months
The turning point usually comes somewhere between half a year and a year and a half. That is when the effects of warm steam on the wall over that period become visible. At first, the affected areas may simply seem slightly uneven. Later, clear bubbles and bulges form in the paint, particularly:
- on the ceiling above the shower or bath
- on walls directly opposite or beside the shower
- in corners where steam accumulates most heavily
Humidity in these areas is often well above 80 per cent. That is simply too much for standard interior paint. It absorbs the moisture, loses adhesion and starts to detach from the wall. Suddenly, a light press of a finger can be enough to make entire sheets of paint crumble away.
The physics behind bathroom paint failure
Why ordinary wall paint has no chance in a bathroom
The cause is not poor painting technique, but the wrong material. Showering produces substantial amounts of water vapour. This steam spreads through the room, meets cooler walls and partly condenses. Some of that moisture then passes through the paint layer and into the substrate.
When paint has not been specifically protected against moisture, it behaves like a sponge. Tiny cracks and microscopic pores allow damp to creep behind the coating. From there, it slowly pushes the paint layer back outwards until it comes away.
“The paint does not fail from the outside-it is literally pushed up from within by water vapour.”
Simply painting another coat over the top only makes matters worse. The moisture remains trapped, bubbles return sooner, and eventually two layers crumble off rather than one.
How to recognise genuinely suitable bathroom paint
The key requirement is a coating developed for humid rooms. In practical terms, this means choosing specialist bathroom or kitchen paints, or products with clearly stated moisture resistance.
Professional decorators look at technical standards. A commonly cited European marking is a classification under a standard that assesses wet-scrub resistance and moisture resistance. The higher the resistance class, the better the paint is likely to perform in a bathroom.
| Criterion | Unsuitable paint | Suitable bathroom paint |
|---|---|---|
| Intended use | Living rooms, hallways | Bathroom, kitchen, utility room |
| Moisture resistance | Low | High, specifically stated |
| Cleaning | Dry wiping only | Can be wiped wet, scrub-resistant |
| Binder | Basic emulsion paint | Specialist resins, durable emulsion |
At the DIY shop, it is worth reading the tin closely. Terms such as “for humid rooms”, “bathroom paint”, “mould-resistant”, or information about wet-scrub resistance are clear indicators. Saving money at this stage often means paying twice later on.
Recovery plan: making bathroom paintwork durable
Remove old paint and secure the substrate
Once the paint has started bubbling, a decisive approach is needed. All loose areas must be removed carefully. That means scraping, sanding and taking off every detached section. Any area that sounds hollow or feels soft needs to come away.
The wall then needs to be stabilised. Small cracks and uneven sections can be levelled with filler. A new coat is worthwhile only once the substrate is sound and dry again.
“The best bathroom paint finish does not depend on the most expensive paint, but on a clean, dry and properly prepared substrate.”
Primer and suitable paint are essential
Before applying the actual paint, a suitable primer should always be used in the bathroom, especially in heavily exposed areas such as the ceiling above the shower. This primer reduces the substrate’s absorbency and acts as a barrier layer against moisture.
The bathroom paint is then applied. A two-coat system is sensible:
- apply the first coat evenly using a roller or brush
- allow it to dry completely for at least 24 hours
- apply the second coat with the roller moving in a slightly different direction
This “crossed” technique produces an evenly sealed surface. Applying the second coat too quickly risks tension within the coating, which can also lead to earlier damage.
Without effective ventilation, every paint will lose
No paint finish can last if the room remains permanently tropical and damp. Bathroom ventilation therefore plays a major part. In many homes, leaving a window on the latch is not sufficient, as only some of the humid air can escape.
Mechanical extraction is ideal, for example a fan that takes air from the shower or bath area directly outside. As a guideline, the air in the bathroom should be completely replaced several times per hour. In practical terms, it already makes a major difference if the fan continues to run for a few minutes after leaving the shower.
- Open the window fully immediately after showering.
- Do not keep doors permanently shut, so that air can circulate.
- Clean the extractor fan regularly to maintain its performance.
- Do not dry towels and laundry in the bathroom on a permanent basis.
What DIY enthusiasts can learn from the “bubble fiasco”
Prevention instead of repainting every year
Anyone who has seen attractive bathroom paint peel away in layers after a year will pay much closer attention to materials and application on the next project. The combination of:
- a suitable primer for humid rooms
- specialist bathroom paint or mould-resistant paint
- careful application with proper drying times
- reliable ventilation of the room
significantly extends the life of the paint finish. Rather than redecorating every 12 to 18 months, a well-planned solution will last several years without bubbles or cracks becoming a nuisance.
Practical advice for the next bathroom project
Particularly in older homes with limited technical equipment, it is worth carrying out a short “bathroom check-up” before making the next brushstroke:
- How high does the humidity rise during showering? A simple hygrometer costing only a few pounds provides a quick answer.
- Where does the most steam collect? Check ceiling areas and corners more closely.
- Is the extractor fan still working properly, or is it too weak for the room?
- Are the walls or ceiling already visibly discoloured or powdery?
Checking these points in advance reduces the risk of falling into the same trap as many “Sunday DIYers” who reach in good faith for the first available interior paint. A bathroom is not simply another living room-it belongs in a category of its own from a building-performance perspective.
As a rule of thumb, the more often the shower or bath is used, the more carefully materials and ventilation must be chosen. In family bathrooms with daily showers, a robust solution suitable for humid rooms is always advisable. In a rarely used guest WC, a sound standard paint with a good primer may sometimes be enough, provided nobody takes hot showers there every day.





Comments
No comments yet. Be the first to comment!
Leave a Comment