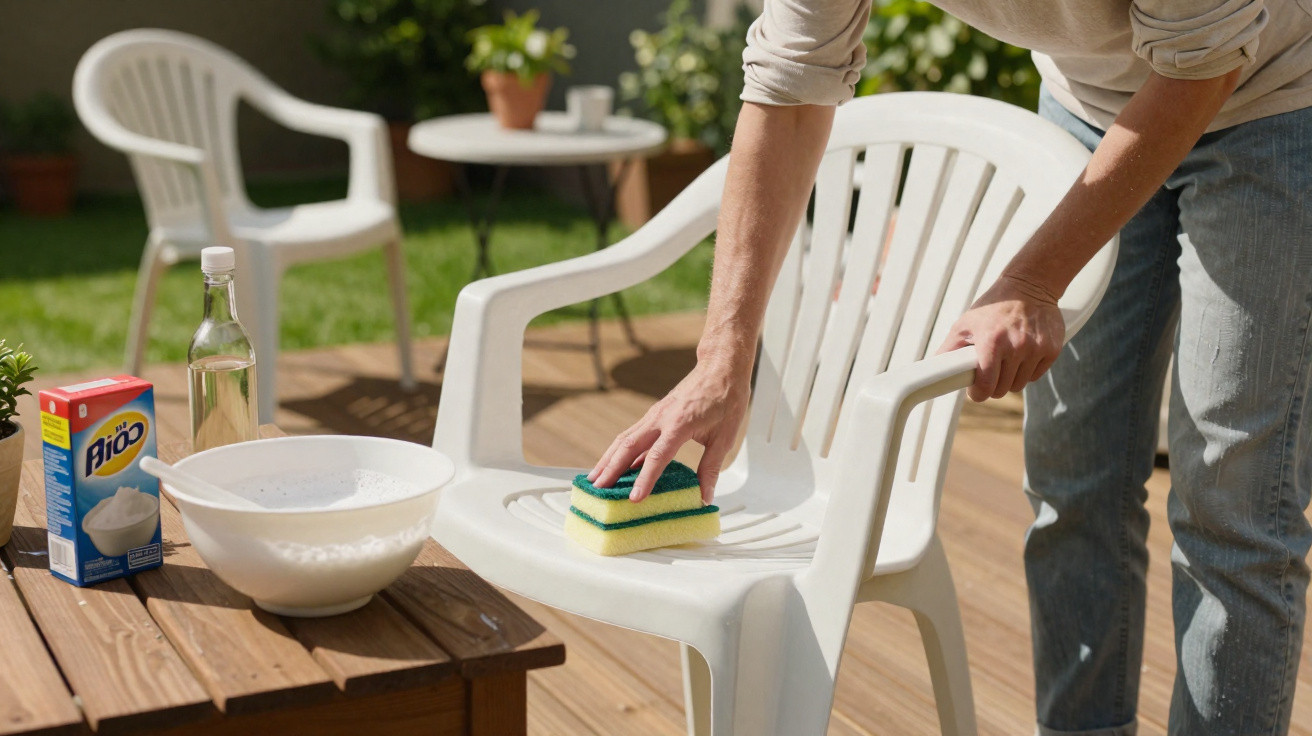
Many owners of plastic patio sets will recognise the sight. During winter, grime becomes embedded, UV radiation ages the plastic, and a once-brilliant white set can suddenly look ready for the tip. Throwing it away too quickly costs money: a straightforward household cleaning mixture can restore many pieces of furniture remarkably well.
Why plastic garden furniture turns grey and yellow so quickly
Plastic is considered easy to maintain, but outdoors it is constantly exposed to the elements. Sunlight, rain and dirt noticeably alter its surface over time.
UV rays attack the plastic's top layer, making it more brittle and creating microscopic pores. Dust, pollen and soot particles settle in these tiny openings, producing what looks from a distance like a grey film.
This is particularly apparent on white PVC chairs, which take on a yellowish cast that makes them look old and dirty. On coloured furniture, the result tends to resemble fading instead: red turns pink, while green becomes pale and uneven.
“The more damaged the surface is, the more firmly dirt adheres to it – and the older the whole set appears, even though its structure is often still sound.”
Compared with wood, metal or woven furniture, plastic is nevertheless relatively easy to revive. Wood requires oil and sanding, metal needs rust removal and repainting, and polyrattan can break or fray. Plastic furniture may soon look worn, yet a well-planned cleaning process can often improve it significantly.
The household remedy that brightens dull plastic again
The method has two stages: clean thoroughly first, then tackle discolouration with a targeted mixture. Many people fail because they reach straight for a “miracle paste” while the heavier dirt is still stuck to the furniture.
Step 1: thorough initial cleaning
- Remove cobwebs, leaves and loose dust using a soft brush or hand brush.
- Fill a bucket with warm water and a little washing-up liquid.
- Wipe down every surface with a soft cloth or sponge.
- Leave it briefly, then rinse with clean water.
This first pass removes grease films, pollen and loose deposits. Only then can the actual mixture work effectively on the greyed or yellowed surface.
Step 2: the household cleaning mix
The base mixture combines lukewarm water, white vinegar and bicarbonate of soda. Add a small amount of washing-up liquid as well.
| Ingredient | Quantity | Purpose |
|---|---|---|
| Water (lukewarm) | 500 ml | Loosens dirt and makes the mixture easier to spread |
| White vinegar | 1 tbsp | Dissolves limescale and neutralises odours |
| Sodium bicarbonate (bicarbonate of soda) | 2 tbsp | Mild abrasive and cleaning booster |
| Washing-up liquid | 1 small squirt | Removes grease and light discolouration |
Pour the mixture into a spray bottle, shake it briefly, then spray the pre-cleaned furniture generously. Work it in with a soft sponge using circular motions. Leave it for a few minutes before rinsing thoroughly with clean water.
“The combination of vinegar and bicarbonate is mildly abrasive without scratching the plastic, and it lifts typical greying surprisingly well.”
If you do not have a spray bottle, mix the solution in a bowl and apply it with a sponge instead. The key point is not to let it dry for too long, as the minerals can otherwise leave white streaks.
What helps with stubborn stains – and what causes damage
Some furniture has endured more than one rainy summer. Resin marks, barbecue grease and black rubber scuffs from chair legs require a little more effort.
Gentle options for problem areas
- Cleaning stone / clay-based cleaning paste: Particularly suitable for white furniture, as it lightly polishes without leaving grooves.
- Mild cream cleaner: Use only with plenty of water and very gentle pressure; test it on an inconspicuous area first.
- An old toothbrush: Excellent for grooves, embossed details and difficult-to-reach corners.
With coloured furniture, it is always worth carrying out a small test on the underside. Some pastes may slightly alter the shade or turn glossy surfaces matt.
Keep these products away from plastic garden furniture
- Chlorine- or bleach-based mould removers: these attack the material and can make stains even more noticeable.
- Steel wool, scouring pads and coarse sandpaper: they create scratches in which dirt collects even faster later on.
- Pure cooking oil or car polish not intended for plastic: these leave behind greasy, sticky surfaces.
“Overly aggressive methods often create a brief ‘wow effect’, but they significantly shorten the plastic's lifespan.”
Repair rather than replace: when the effort is worthwhile
Before spending hours scrubbing, make an honest assessment. Not every chair remains safe, even if it could look perfectly respectable again.
Safety check before cleaning
- Inspect frames and seats for cracks and breaks.
- Gently flex the chair legs: if the material gives way heavily, it may be at risk of breaking.
- Avoid discoloured areas with hairline cracks, as the plastic is often brittle there.
If deep cracks are visible or the furniture makes cracking noises when loaded, it belongs at a recycling centre rather than back on the patio. In this case, safety clearly takes priority over appearance.
Cosmetic repair for damaged surfaces
If the structure is stable, there is still plenty that can be done. Fine sandpaper, at around 120 grit, can smooth dull, slightly eroded areas. A specialist plastic paint can then be applied to create an even finish again.
Spray paint for outdoor plastic works well on chairs and tables with numerous curves. If using a brush, apply thin coats to prevent runs. It is important to follow the manufacturer's instructions on drying time and weather resistance.
How to delay further yellowing considerably
Once the furniture is clean again, how it is cared for over the following months determines its future. A number of simple habits can extend its life.
- Choose the location carefully: Do not leave it permanently in intense midday sun if shade is available.
- Use a cover: A simple protective cover greatly reduces UV exposure and dirt.
- Give it a winter break: Stack chairs and store them in a garage, cellar or dry shed.
- Wash it quickly at regular intervals: Wipe it over with washing-up water every few weeks rather than undertaking one major clean each year.
“Anyone who treats plastic furniture like a car – covering it, washing it occasionally and not parking it permanently in the harshest sunshine – will enjoy it for much longer.”
Why vinegar and bicarbonate work so well
Many household-remedy tips sound appealing but have hardly any measurable effect. In this case, there is some chemistry behind the method, which makes it worth examining more closely.
White vinegar contains acetic acid. This dissolves limescale and mineral deposits, such as those caused by rainwater or splashing water. These layers in particular can make surfaces appear dull and patchy.
Bicarbonate of soda is mildly alkaline and acts like a very fine scouring powder. Combined with water and a little friction, it loosens embedded dirt without sanding the material too harshly. Together with washing-up liquid, it produces a mixture that tackles grease, organic residues and light limescale at the same time.
A realistic scenario: what the mix can and cannot do
If the same white plastic chair has been left unprotected in the sun for ten years, no household remedy will restore it to a factory-new condition. Even so, an impressive amount can be salvaged in a weekend.
Typically, the mixture noticeably brightens greying, removes many yellow shadows and creates a more consistent overall appearance. Minor variations in shade often remain visible, but they are no longer as dominant. That is entirely adequate for a barbecue evening with friends, and buying replacements can wait for several more seasons.
Taking a before-and-after photograph can be useful. It lets you see what the treatment has achieved and whether a second application is worthwhile or the practical limit has been reached.
When changing material is worthwhile
Anyone dealing with the same problems every year can make a more strategic choice next time they buy. Not all plastic is alike, and not every material ages as unforgivingly.
- Plastic with UV protection: Marked as such by the manufacturer; usually slightly more expensive but considerably more durable.
- Solid-coloured plastic: The colour is mixed into the material rather than applied only to the surface, reducing visible wear.
- Combination furniture: A metal frame with plastic seating combines stability with a smaller surface area exposed to dirt.
- Wood or metal: These need more maintenance but offer a different appearance and different ageing effects.
If you already own a set, you can also take a gradual approach: replace severely damaged items, restore intact pieces using the household remedy, and upgrade step by step instead of disposing of everything at once.




Comments
No comments yet. Be the first to comment!
Leave a Comment