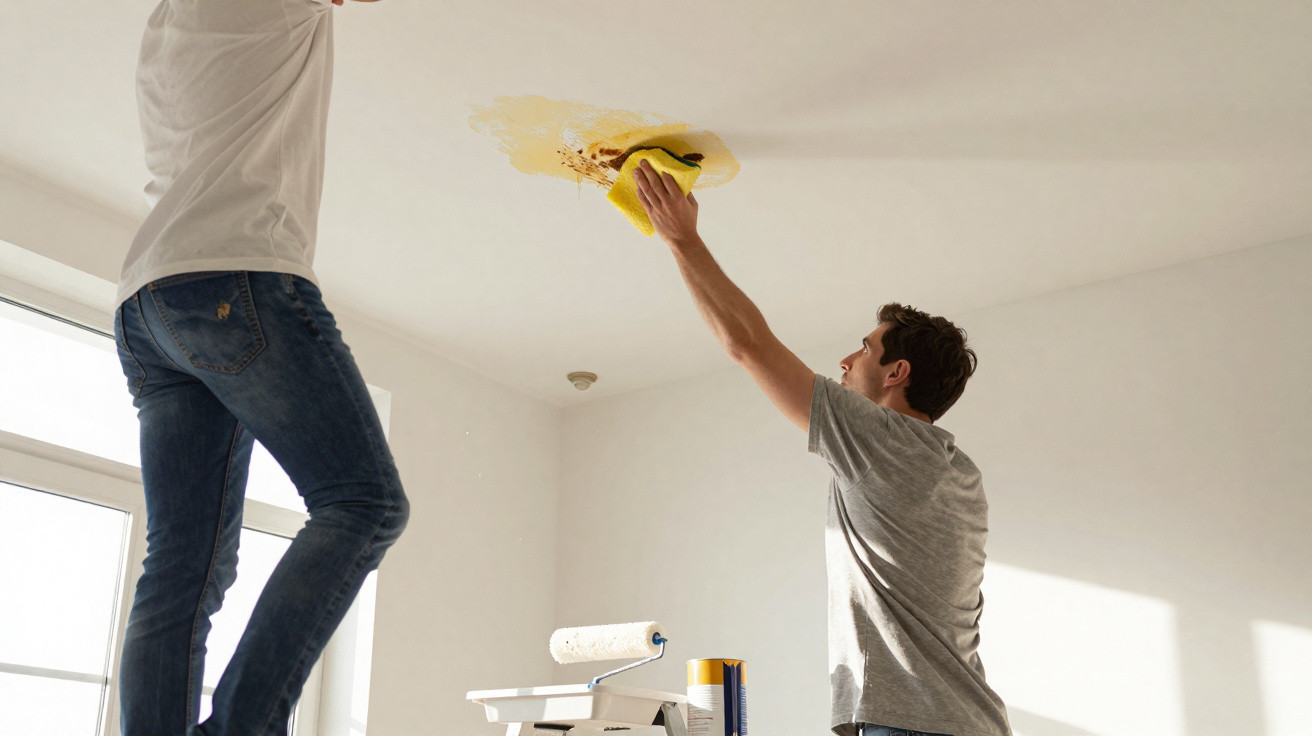
Many homeowners give their ceilings a new coat of paint each autumn, expecting to wipe away accumulated smoke, grease and moisture. Yet the spotless appearance seldom endures. What seems to be a paint failure is usually a preparation error that DIY painters commonly make without noticing.
Why your “fresh white” ceiling keeps letting you down
The quick-fix reflex: repainting instead of preparing
For many people, ceiling paint works like a magic eraser. They spot marks, shadows and grey areas, then apply a generous coat of white paint. Everything may appear flawless for several days. Before long, however, yellow halos quietly return near the light fitting, over the cooker or around the room’s edges.
This is not usually because the paint brand has let you down. The ceiling is still holding everything it has encountered over the years: cooking fumes, candles, fireplaces, cigarettes and periods of winter damp.
Ceilings don’t forget: they store grease, nicotine and moisture deep in the surface, then push it back through your new paint.
Painting directly over this build-up simply creates a clean white layer over a contaminated surface. The outcome can be stains that “bleed” through, paint that bubbles, or gradual yellowing that appears impossible to prevent.
What paint can’t hide: nicotine, soot and invisible grease
Even ceiling paints with excellent coverage can only conceal underlying problems temporarily. Nicotine and tar left by previous smoking dissolve into older paint coats and keep moving through them. In open-plan kitchens, grease particles travel around the home before settling on the coolest surface, which is often the ceiling. Candle and wood-burner soot catches on minute flaws in plaster.
Whenever you repaint without removing this film, the contamination remains trapped beneath another layer through which it can migrate. Certain areas may yellow within days, while others emerge gradually as temperatures rise and fall through the seasons.
If your ceiling yellowed once, it will yellow again unless you change what happens before you open the paint tin.
The simple “sponge test” that tells you if painting is pointless
What your ceiling has really gone through
Instead of judging the ceiling by your last five minutes with a roller, think about what the room has experienced during the past five years. Has it had:
- Frequent frying or grilling without an effective cooker hood
- Candles or incense burning slowly on most evenings
- A nearby wood burner or open fire
- Smoking, even where it ended years ago
- Condensation, leaks or areas of damp
All of these release moisture or particles that rise upwards. Over time, the ceiling absorbs them gradually. Once the surface begins to look worn, the issue is often embedded rather than merely superficial.
How to check if your ceiling needs degreasing first
In less than two minutes, you can carry out a highly informative test. Use a clean, pale-coloured sponge or cloth, dampen it with warm water, then wring it out thoroughly. Lightly wipe a 20–30 cm area of ceiling close to the kitchen, an air vent or a pendant light.
| What you see on the sponge | What it usually means |
|---|---|
| Almost nothing, just dust | Normal dirt: light cleaning and a good primer should be enough |
| Yellow or brown stains | Nicotine, cooking fumes or old soot migrating through layers |
| Greasy grey film, slightly slippery | Cooking grease build-up needing an alkaline degreaser |
| Dark streaks or black dust | Soot deposits from candles, burners or a chimney |
When the sponge remains clean, a gentle wash followed by stain-blocking primer may be sufficient. If it comes away yellow, brown or greasy, avoiding a thorough clean makes it highly likely that the stains will return through the next paint coat.
The step nearly everyone skips: proper degreasing
Why water alone won’t fix a yellowing ceiling
Washing a ceiling with plain water can feel worthwhile, but it rarely removes the unseen film responsible for the issue. Grease and nicotine cling to existing paint, so they require chemical action rather than a simple rinse.
Eight DIYers out of ten go straight from dusting to painting. The yellowing comes back because the greasy film never left.
Professional decorators commonly use alkaline cleaners for this task. These break down oily residues and neutralise the layer that might otherwise “bleed” into fresh paint.
The simple degreasing mix that changes everything
A standard household ceiling does not require specialist trade products. A simple solution, mixed at the right strength, will generally be enough. For one average-sized room, you need:
- 10 litres of warm water in a bucket
- 1–2 tablespoons of washing soda (soda crystals) or a strong liquid sugar-soap
- One non-abrasive sponge or microfibre cloth
- A second bucket containing clean rinse water
- A sturdy step ladder and protective gloves
First, remove dust using a soft brush or a vacuum cleaner attachment. Work across the ceiling in manageable sections, wiping with the alkaline mixture without saturating the plaster. Rinse each section with a clean, damp sponge. Allow the ceiling to dry completely, preferably overnight with some ventilation.
When yellow stains fight back: moisture, leaks and hidden damage
Why paint blisters, peels or turns patchy
Some ceilings do more than yellow: they blister, peel or develop uneven patches, particularly after cold weather or heavy rain. In these situations, grease and nicotine are not the only possible causes.
Potential causes include:
- Older or recent water leaks from pipework or the roof above
- Ongoing condensation in bathrooms or kitchens with poor ventilation
- Salt deposits in old plaster reacting to moisture
- Incompatible historic paint layers, particularly gloss or oil-based finishes beneath newer acrylics
If water damage has happened, washing and repainting alone rarely provides a lasting solution. The affected section may need several weeks to dry. For persistent damage, loose plaster might need scraping back, followed by proper repair and sealing before decoration can begin.
The role of stain-blocking primers
After the ceiling has dried fully and been degreased, professionals generally take a further targeted measure: applying stain-blocking primer. This primer forms a barrier that prevents nicotine, soot and old water stains from passing into the top coat.
On ceilings with a long smoking history or past leaks, the primer layer matters more than the final colour coat.
For severe staining, decorators often select solvent-based or specialist shellac primers, which produce a more robust seal than ordinary acrylic undercoats. With one or two properly dried coats, a ceiling that once looked permanently patchy can become a stable surface that remains white for much longer.
Small habits that keep your ceiling white for years
Daily choices that protect your paintwork
After spending time cleaning and repainting, a handful of everyday practices can help the ceiling stay clean for longer:
- Use the cooker hood whenever you fry, grill or sear food.
- Open a window slightly during hot showers and for several minutes every morning.
- Keep candle wicks trimmed, and do not burn candles for hours in small, enclosed rooms.
- Gently dust ceilings once or twice yearly using a soft brush with a long handle.
- Look for small leaks or damp rings after storms or plumbing work.
These actions may seem insignificant, but they greatly reduce the amount of grease and soot the ceiling needs to absorb between repainting jobs.
How to decide between repainting, cleaning or full renovation
Before buying another tin of paint, spend ten minutes examining the room closely. Check around corners, vents and above radiators, and compare areas in daylight as well as artificial light. Where the ceiling is mainly dull or lightly grey, washing and one fresh coat may be all that is needed. If there are distinct yellow rings, nicotine patches or wavy marks, include both a deep clean and stain-blocking primer in the plan.
In older homes, recurring yellowing and peeling may point to issues with insulation or ventilation. A basic humidity meter can show whether the room regularly exceeds 60% humidity. If it does, better airflow, extractor fans or work to address cold bridges in the building fabric will safeguard every later coat of paint.
Ceilings record a home’s everyday habits: its cooking, heating, ventilation and way of life. Viewing yellowing as a warning sign, rather than solely a cosmetic irritation, can lead to cleaner air, fewer damp problems and less frequent repainting. Then, when you next take up the roller, the white paint you apply has a genuine chance of staying white.
















Comments
No comments yet. Be the first to comment!
Leave a Comment