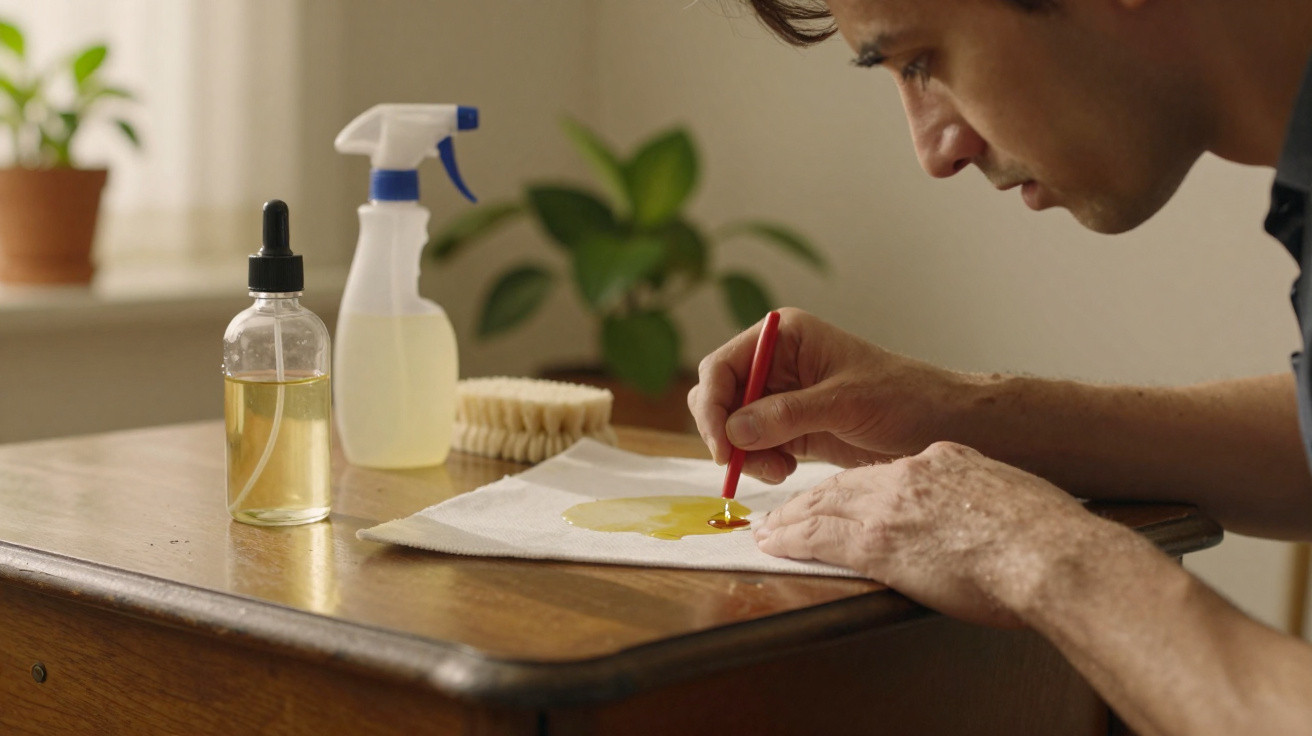
The video opens like a minor miracle. In a poorly lit garage, a tired, scratched chest of drawers is filmed looking dull before a few wipes of a “magic mix” from a mason jar make it appear warm and golden. The creator grins, the comments surge, and the caption reads: “Restore any wood in 5 minutes with this genius hack.”
By the clip’s final seconds, half its audience is ready to search through the cleaning cupboard.
A week later, there is another scene. A similar chest of drawers sits in an actual living room beside a plant that has clearly had better days. Its surface is tacky, unevenly darkened and marked with cloudy stains that will not shift. Someone off camera remarks that the smell has still not cleared from the room.
The hack succeeded on video. It did not succeed on furniture that genuinely matters.
The same formula for a “DIY wood rescue” circulates across Facebook groups, TikTok and Instagram Reels. Household oils, kitchen-store ingredients and an unidentified brown liquid are combined and presented as a fast alternative to professional restoration.
Experts are beginning to challenge it. What they say may change the way you view every viral before-and-after in your feed.
Why this viral DIY wood hack is blowing up your feed - and your furniture
Keep scrolling and it will eventually appear: a hand massaging a murky mixture into a worn, scratched table while a voiceover promises “no sanding, no tools, just this simple trick.”
The recipe differs slightly between videos, yet the central premise remains unchanged: combine cooking oil with a little vinegar or lemon juice, perhaps add dark stain or coffee, and insist it “restores” wood within minutes.
It creates a striking result on camera. Wood instantly appears darker, glossier and more luxurious. Fine scratches seem to vanish beneath the sheen. The creator sits back proudly while comments fill with “I’m doing this tonight” and fire emojis.
That transformation is compelling on a screen. Away from it, the outcome can be very different.
In a private Facebook group for vintage furniture enthusiasts, a member shared two photographs next to each other. The first featured a handsome mid-century teak sideboard: a little dry, but still full of character. The second showed the same item after the viral oil-and-vinegar hack.
Its grain appeared clogged and murky, while the sheen was patchy, as though sunscreen had been rubbed into polished shoes.
“It felt greasy for days,” she wrote. “Then it started getting sticky where we touched it more. Now dust just glues itself on.”
Professional refinishers replying beneath the post were unequivocal: this is not restoration - it is damage happening slowly.
Furniture conservators explain that most of these mixtures do not “feed” the timber. Instead, they remain on the surface, penetrate ageing finishes, soften them and hold dirt in place. The early shine deceives the eye because oil temporarily intensifies colour.
Beneath that brief glow, however, the original finish may start to deteriorate. Veneer edges can rise, wax can collect in corners, and cleaning becomes more difficult with every passing month.
Some recipes are worse still, pairing acidic ingredients such as vinegar or lemon with oils and colourants. This combination can react with old finishes, producing cloudy marks or streaks that no microfibre cloth can remove.
It is restoration cosplay - convincing in a 20-second clip, then gradually damaging the furniture you truly value.
What experts say to do instead of the “magic jar” mix
Professionals who devote their careers to preserving heirlooms take a surprisingly uncomplicated approach. There are no secret formulas, mystery jars or pantry experiments.
When they assess tired timber, their first step is not transformation. It is cleaning.
Most recommend either a gentle, pH-balanced wood cleaner or a few drops of mild washing-up liquid in warm water. Use a cloth that is only slightly damp, never wet enough to drip, and clean in the direction of the grain.
The purpose is to remove years of grease, smoke residue and built-up polish, rather than soak the furniture.
Once the surface is clean and fully dry, the appropriate product can be used sparingly: a good-quality paste wax for finished timber, or a dedicated oil such as Danish oil or tung oil for genuinely bare wood.
Nothing improvised from the kitchen cupboard. Nothing “secret” with no ingredient list.
With a worn dining table, a restorer will commonly begin by testing a concealed area. They assess the finish’s reaction and establish whether the surface takes in oil or merely needs the protection of wax.
Where the finish is flaking or peeling, or water rings run deep into it, they stop. At that point, sanding or professional refinishing should be considered, rather than relying on a DIY mixture in a jar.
Viral mixtures appeal because they claim to eliminate the tedious stages. There is no waiting, no test patch and no need to research timber species or finish types.
On a busy Tuesday evening, after work and washing up, a “five-minute miracle” can sound like salvation.
One member of a forum for amateur restorers said they had tested the oil-and-vinegar hack on a cheap bookcase “just to see.” It initially looked acceptable, so they then used it on a family cedar chest that had belonged to their grandmother.
Within two weeks, dark patches had developed where the mixture had pooled, and a sweet, rancid smell was beginning to emerge.
The experts’ responses were frank: the oils in many such recipes can turn rancid, particularly cooking oils that were never intended to sit on timber for extended periods.
That sticky, faintly sour smell? It is your “magic” becoming a layer of decomposing grease over the finish.
For an immediately “rich patina” effect, some creators also mix in coffee grounds, tea or dark stain. In video footage, this can look warm and deep.
On real furniture, though, it may result in streaks, blotches and irregular dark areas that draw attention to old scratches rather than concealing them.
Professionals often compare restoration to medicine. You do not prescribe the same treatment for every symptom. You examine the patient - here, the furniture - and make a diagnosis.
Is it solid timber or veneer? Is its finish lacquer, shellac, polyurethane or oil-wax? Is the problem only surface grime, or has the finish itself failed?
Every answer requires a different and carefully targeted approach. It could involve refreshing shellac with alcohol, gently re-amalgamating a finish, or completely stripping and refinishing severely damaged tops.
The belief that one homemade potion can “fix anything” conflicts with everything learned in restoration workshops and conservation laboratories.
One conservator likened the viral mixture to pouring unknown chemicals into the engine of a vintage car because TikTok claimed it “makes it run smoother.” It may purr briefly.
Then the genuine trouble begins.
How to truly care for wood furniture without wrecking it
There is a quieter sort of hack, one that spreads less quickly on social media: practical, mildly unexciting maintenance that genuinely works.
It starts with one straightforward habit - dusting with a soft, dry cloth.
This alone prevents grit from acting as fine sandpaper whenever you put down keys or move a vase. No product. No added shine. Simply less damage over time.
Then, once or twice each year, give the piece a proper refresh.
For many finished items, this can be as simple as using a dedicated wood cleaner followed by a thin layer of quality paste wax.
Work in small areas, apply it with a soft cloth, allow it to haze, then buff until the surface is smooth and dry rather than oily.
A suitable furniture oil may help genuinely dry, unfinished timber - often found on old, heavily worn tables or raw pine furniture.
Apply it lightly, let it absorb, then thoroughly remove every trace of excess so that nothing remains on the surface and becomes sticky later.
Let us be honest: hardly anyone does this every day. Life becomes noisy, and furniture generally fades into the background until it looks “bad enough” to address.
That is partly why dramatic hacks spread so readily - they speak to the moment of panic when every scratch suddenly becomes visible at once.
The guilt is real on a human level. A London-based restorer says many clients arrive with the same line: “I tried to fix it myself and made it worse.”
There can be embarrassment and a feeling that they have failed the object’s story - the table received as a wedding gift, the inherited chest of drawers, the flea-market find they promised they would “do right.”
Rather than judging them, the best experts provide something different: a reset. They explain that even professionals learned through mistakes, just not on grandma’s armoire.
They also offer straightforward guidance that anyone can follow, including those in a small flat without a workshop, sander or specialist equipment.
“It’s about doing less, but doing it right. Most of my job is undoing shortcuts.”
She often asks new clients to remember three points:
- Test every product in an inconspicuous place before applying it to a visible area.
- If it smells like the kitchen, keep it in the kitchen - not on heirlooms.
- Shine is not the same as health. Timber that is dry but structurally sound often needs gentle maintenance, not a drastic makeover.
This advice does not always become viral. It does not arrive in a mason jar, nor will it turn a wreck into a showroom piece in 10 seconds.
Still, it quietly protects more furniture than any trending TikTok sound.
The quiet backlash against quick fixes - and what you do next
As more people share stories of hacks that went wrong, a subtle change is under way. Cabinetmakers, restorers and even museum conservators are now appearing in the comments below viral videos.
They post lengthy, highly detailed explanations of why a mixture might appear effective for a week but fail over a year.
What once seemed like a basic cleaning tip is turning into a discussion about how we value objects in a world built for endless scrolling. Do we want furniture that looks good in a photograph for a day, or pieces that grow old alongside us, marks and all?
At a deeper level, it concerns patience in a culture hooked on instant outcomes.
One small but revealing trend is the rise of accounts showing the “boring middle” - slow cleaning, meticulous masking and candid mistakes. Their videos do not always go viral, but they build dedicated communities.
People share their own tests, ask questions and acknowledge when a hack that sounded too good to be true has misled them.
Practically speaking, the next time a magic wood-restoring mixture appears in your feed, you may see it differently. You may ask what finish the furniture had, whether the creator shows it again a month later, and whether professionals have offered an opinion.
You may even wait a day before applying anything to the dining table around which so many birthdays have been celebrated.
On a more personal note, there is a quiet relief in accepting that something does not have to look “brand new” to deserve appreciation. A scratch from where your child knocked a toy, a ring left by late-night tea, a softened spot on a chair arm where someone always sits - these are not failures.
They are evidence of a life lived with timber that was never intended to be disposable.
Perhaps, then, the real hack is not in a jar at all. Perhaps it lies in changing how we regard our furniture: less as Instagram props to be polished into perfection, and more as long-term companions deserving thoughtful attention, even when the process is slower, messier and rarely ready for the camera.
That may not look as spectacular on screen. At home, it quietly changes everything.
| Key point | Detail | Why it matters to the reader |
|---|---|---|
| Viral hacks are misleading | Oil-vinegar mixtures and stains conceal imperfections for a few days but degrade finishes | Helps prevent damage to furniture that may be irreplaceable |
| Genuine restoration is specific | Every timber and finish type requires a dedicated, tested method | Helps you select the right approach instead of a “one-size-fits-all” solution |
| Simple prevention works | Regular dusting, appropriate cleaner, and good-quality wax or oil | Extends furniture life without unnecessary expense or risk |













Comments
No comments yet. Be the first to comment!
Leave a Comment