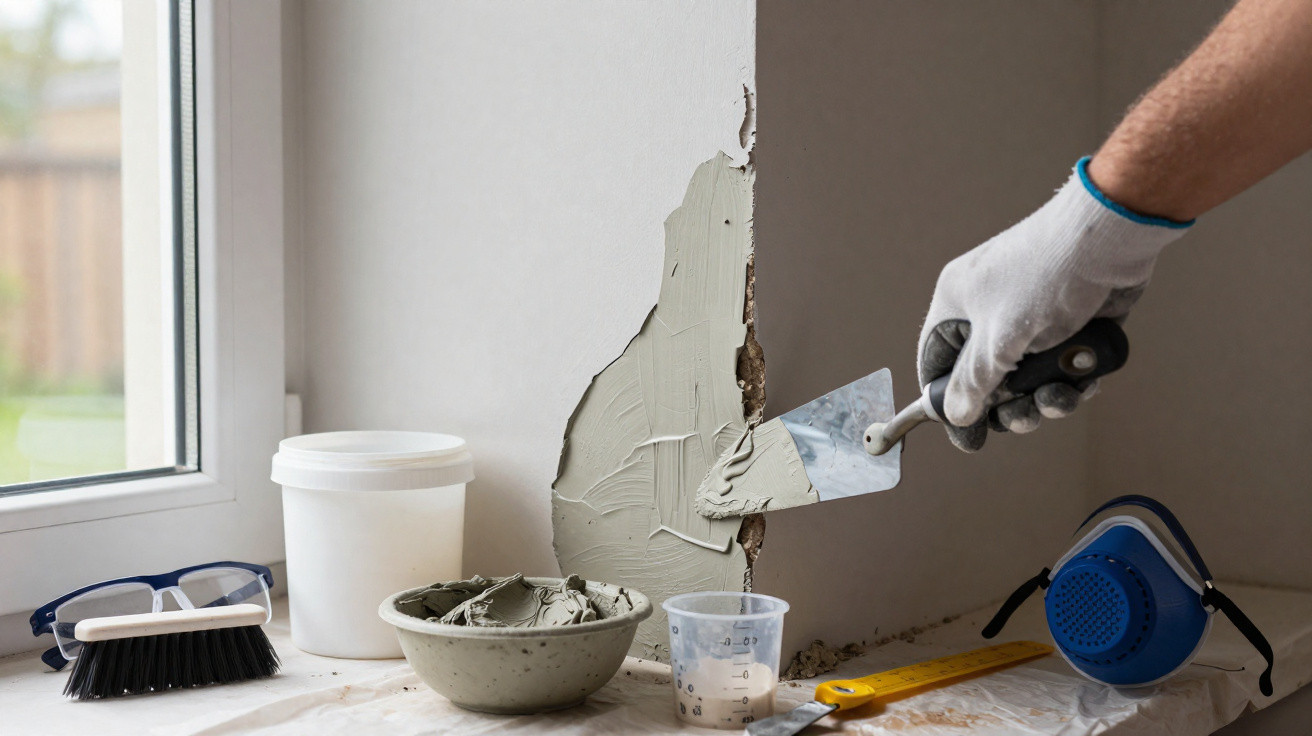
A crumbly corner, a hairline crack or a patch that will not stay put can make an otherwise good DIY job look unfinished. It is tempting to mix ordinary white glue into cement in the hope of producing a tougher, smoother repair.
There is a grain of truth behind the idea: some building bonding agents are designed to improve adhesion in particular cement-based jobs. But ordinary household PVA is not a universal cement additive, and it is not the best answer for every crack or hole. For a finish that lasts, choose a repair material suitable for the surface, prepare the area properly and follow the product instructions.
The reliable trick is not adding more glue or water. It is using the right repair material on a clean, sound surface.
Why ordinary white glue is not a catch-all solution
Many white household and woodworking glues are PVA-based, but their formulations vary. A glue intended for crafts, paper or timber may not be suitable for alkaline cement, damp conditions, outdoor exposure or a surface that moves slightly over time.
A building PVA bonding agent or another purpose-made additive may be suitable for some small, protected repairs when used exactly as directed. Depending on the product, it may be used as a bonding coat or added to the gauging water for mortar.
That does not make a cement-and-glue mix suitable for every job. It cannot reliably:
- repair a moving or widening crack;
- solve water ingress, damp or salt contamination;
- replace failed brick pointing;
- repair spalled concrete around reinforcement;
- strengthen weak masonry or a load-bearing surface;
- substitute for tile adhesive, grout, render or waterproofing.
For floors, steps, outside walls, bathrooms, fireplaces and structural areas, buy a repair product clearly labelled for the intended use.
First, work out what needs repairing
A neat patch will not last if the underlying problem is still active. Before mixing anything, establish whether the damage is purely superficial.
1. Look for warning signs
A tiny stable blemish in internal plaster or a shallow, non-structural cement patch may be manageable as a DIY task. Pause and seek advice from a competent tradesperson or surveyor if you notice:
- cracks that are widening, recurring or diagonal;
- loose bricks, bulging render or a damaged lintel;
- rust marks, exposed steel or flaking concrete;
- persistent damp, mould, white salts or water leaks;
- cracks near chimneys, gas appliances or electrical fittings.
Do not cover these problems with a cosmetic repair. The cause may need attention first.
2. Match the material to the surface
For a small cement-based repair, use a suitable ready-mixed repair mortar or the correct sand-and-cement mortar where appropriate. Fine proprietary repair compounds are often easier to apply neatly than neat cement.
For older brickwork and period properties, take extra care. Hard cement mortars can be unsuitable for softer historic bricks and lime mortar. A lime-compatible product may be needed, particularly for repointing solid-walled homes.
Prepare the patch properly
Preparation has more influence on adhesion than an improvised ingredient. Fresh material will only hold as well as the surface beneath it.
1. Remove loose material
Scrape or brush away failed paint, dust, friable mortar and anything that sounds hollow or lifts easily. Use a stiff brush, scraper or small chisel with care.
For a hole in masonry or render, remove weak edges until you reach sound material. Avoid creating a very thin feather edge, as it can break away. Do not rake out sound pointing merely to make the job look larger.
Vacuum or brush off all dust before continuing.
2. Control suction
Very dry brick, blockwork and cement can draw water out of a repair mix too quickly, leaving it weak or powdery. Lightly dampen the background with clean water before applying a conventional cement-based mortar.
The surface should be damp, not dripping. If you are using a proprietary primer, slurry or repair mortar, follow its label instead: some products require a dry surface, while others specify damp substrate.
3. Protect nearby finishes
Mask surrounding tiles, skirting boards, window frames and painted surfaces. Keep clean water and a sponge nearby to remove accidental smears before they harden.
Avoid washing cement residue into drains. Allow small residues to harden on a disposable sheet or in a container, then dispose of them according to local guidance.
If using a bonding agent, follow its label
Do not add an arbitrary squirt of household glue to a bucket of cement. Too much polymer or liquid can affect the mix, increase shrinkage or leave an unsuitable surface, especially in damp areas.
If the label specifically permits use with cementitious mortar, use a building bonding agent only at the stated dilution. The manufacturer’s instructions take priority over recipes found online.
A controlled method for a tiny indoor patch
- Check compatibility. Confirm that the repair compound, mortar and bonding agent are suitable for the existing surface and for a dry internal location.
- Mix small quantities. Make only as much as you can apply within the stated working time. Never try to revive a stiffening cement mix with extra water.
- Use the specified liquid. If the product says to add bonding agent to the gauging water, measure it accurately. If it calls for a separate bonding coat, apply that instead.
- Press in the first layer. Compact the repair firmly into the hole or crack to avoid voids. Build deeper repairs in layers unless the product says it can be applied more thickly.
- Finish at the right moment. Level the patch and match the surrounding texture. Overworking wet cement can bring excess water and fine paste to the surface.
A smooth repair comes from good compaction, a workable mix and patient finishing - not from making the mix runnier.
Cure the repair, rather than rushing it
Cement-based materials need suitable conditions to cure. A patch can feel dry on the surface long before it has reached its intended strength.
For external repairs in the UK, avoid frost, heavy rain, strong wind and very hot direct sun. Protect fresh work from rain and rapid drying in line with the product guidance. Indoors, do not blast a repair with a fan heater in an effort to speed things up.
Wait for the stated curing period before painting, sealing or exposing the area to moisture. Paint applied too soon can trap moisture and spoil the appearance of the finish.
When a purpose-made product is the better choice
Buying the correct material is usually cheaper than repairing a failed patch twice. Use a dedicated system for:
- brick pointing: mortar compatible with the existing masonry, often lime-based on older homes;
- external render: a repair system suited to the current render and weather exposure;
- concrete: a concrete repair mortar, especially if reinforcement could be involved;
- tiles: flexible tile adhesive and grout, not cement mixed with glue;
- wet rooms: appropriate tanking, adhesive and grout systems;
- timber, metal or plastic: fillers and adhesives made for those materials.
A builders’ merchant can help identify suitable categories of product, but the label and technical guidance should determine whether it is right for your particular surface.
Common mistakes that spoil the finish
- Using craft glue without checking its suitability. It may not tolerate cement, moisture or temperature changes.
- Using neat cement for a substantial hole. Cement paste can shrink and crack; use the correct mortar or repair compound.
- Patching over dust or loose paint. The repair will detach with the weak material beneath it.
- Adding too much water. A sloppy mix is easier to spread but more likely to slump, shrink or weaken.
- Treating an active crack as cosmetic. Movement commonly reappears through a rigid patch.
- Painting before curing is complete. This can affect both appearance and durability.
- Working in frost or rain. Fresh exterior cement work is particularly vulnerable to poor weather.
Safety and clean-up
Cement is alkaline and can cause skin irritation and chemical burns. Wear waterproof gloves, long sleeves and eye protection. Avoid kneeling in wet mortar, and use suitable respiratory protection when handling dry cement in dusty or poorly ventilated spaces.
Wash cement from skin promptly with plenty of clean water. If wet cement gets into your eyes, rinse immediately with clean water and seek urgent medical advice. Keep materials away from children and pets.
Never mix cleaning products into mortar or repair compounds. In particular, never mix bleach with acids, ammonia or other cleaners.
The practical bottom line
For a very small, dry, non-structural indoor repair, a compatible building bonding agent can be useful if its instructions specifically allow it to be used with cement-based material. Ordinary white glue is not a dependable shortcut.
The best chance of a lasting finish comes from a sound, dust-free surface, the correct repair product, careful application and enough curing time. If the area is exposed to damp, weather, movement or structural stress, skip the improvised mix and choose a purpose-made repair system instead.











Comments
No comments yet. Be the first to comment!
Leave a Comment