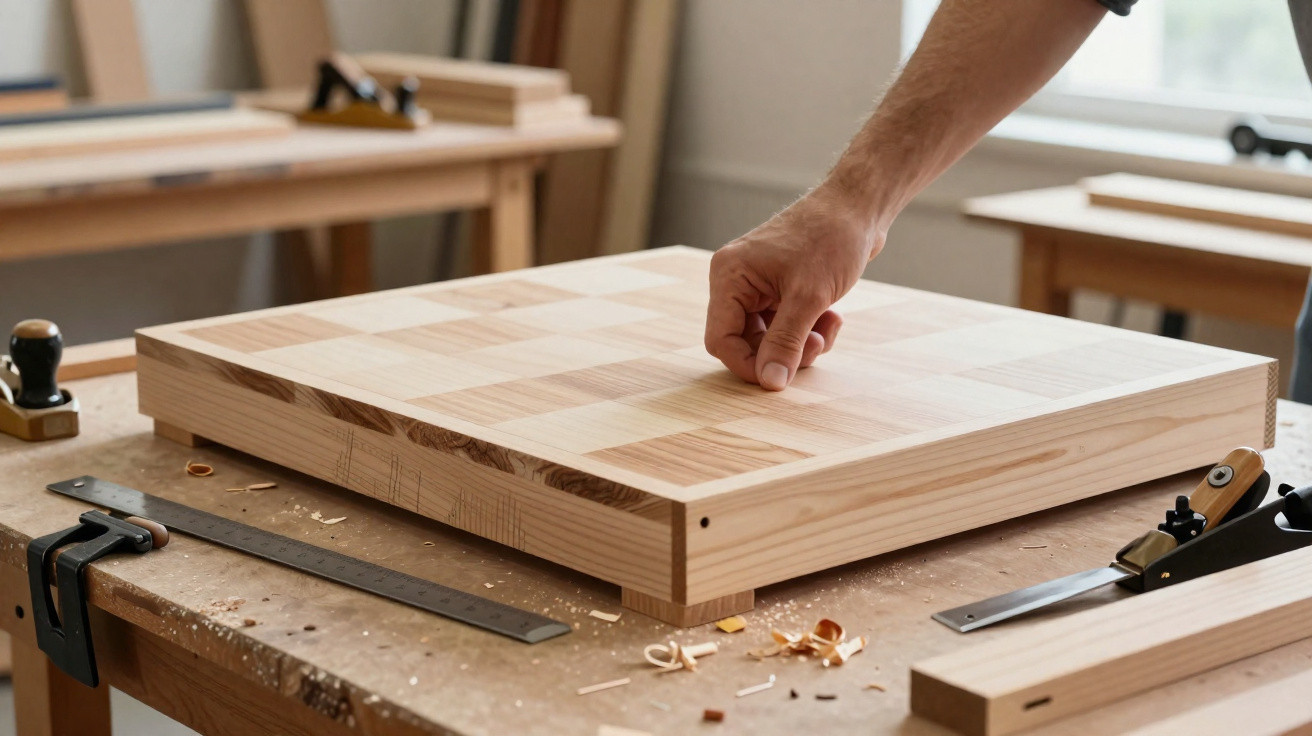
A final practical project can prove an apprentice’s ability in one piece of furniture: accurate setting-out, thoughtful material choices, sound joinery and a finish that stands up to daily use. But an excellent draughts table may still be ineligible for a particular competition.
The useful lesson is to check entry conditions before settling on the design or buying timber. A competition may limit entries by apprenticeship status, qualification, employer membership, training provider or location. The workmanship matters, but eligibility rules can matter just as much.
A practical project should earn its place
It is tempting to make a final piece as elaborate as possible. In practice, a smaller object with a clear purpose often gives a better account of the maker’s skills. It is easier to transport, photograph, assess and use at home.
A compact draughts table can demonstrate plenty of joinery without becoming unmanageable. Depending on its design, it may include:
- accurately prepared solid timber;
- a carefully laid-out chequerboard;
- veneer work, inlay or contrasting timbers;
- mitred corners and clean edge details;
- a frame-and-panel top;
- apron-and-leg joints or a stable pedestal base;
- a hard-wearing finish suitable for regular handling.
The design does not need unnecessary complications. A straightforward table with crisp joints, balanced proportions and a well-executed surface will usually make a stronger impression than an ambitious piece with visible compromises.
A good final project begins with a useful object, then makes every construction decision support that use.
Check the competition brief before starting
Read the full brief before producing cutting lists, ordering materials or committing to a design. This is especially important if the project may be entered for a college show, craft award or trade competition.
Ask for the terms and conditions in writing, and keep a copy. Look for details including:
- who can enter and whether age restrictions apply;
- whether entrants must be apprentices, learners or employees;
- whether a particular qualification is required;
- whether the employer, college or training provider must be affiliated with a named organisation;
- permitted materials, methods and dimensions;
- whether all work must be completed by the entrant;
- registration, photography and delivery deadlines;
- permissions for displaying images of the finished work.
Some competitions are open to all students, while others are intended for apprentices employed by member firms. It is worth clarifying the position early, rather than finding out after the piece is complete.
A quick eligibility check
- Find the complete rules. A poster or social-media announcement may not include every condition.
- Ask the organiser directly. Set out your employment and training arrangement clearly.
- Confirm your employer’s membership status. Do not assume that a respected local business belongs to every federation, guild or trade body.
- Speak to your tutor or training provider. They may know about other exhibitions or awards with different criteria.
- Keep written replies. This reduces the chance of a misunderstanding later.
Plan a draughts table around how it will be used
A draughts table needs to function as furniture first and a playing board second. Consider where it will sit, who will use it and how it will be stored or moved. A modest size may suit a sitting room, home office or spare bedroom, while also making the finished piece easier to take to an assessment or exhibition.
Start with a full-size drawing of the top. Repeated squares make minor errors highly visible, so accurate setting-out is essential. Check the board proportions, border width and how the pattern relates to the base before cutting any visible timber.
Useful design questions include:
- Top construction: Will the board be made from solid timber, veneer, inlay or a stable veneered substrate?
- Timber movement: Is there enough allowance for a solid-wood top to expand and contract across its width?
- Edge protection: Will a lipping, frame or softly rounded profile protect the corners?
- Seating: Is the height comfortable with the chairs likely to be used?
- Storage: Would a shallow drawer for counters be useful, or would it make the design too fussy?
- Base design: Is there enough strength around mortices, tenons and other joints?
In centrally heated UK homes, timber can become noticeably drier indoors during autumn and winter, then gain moisture during more humid spells. Let timber acclimatise in the workshop and do not restrain a wide solid-wood top with rigid fixings across its width.
Choose materials for stability as well as appearance
Expensive timber does not correct poor preparation, but suitable material makes accurate work more achievable. Choose stock that is dry enough for indoor furniture, straight enough for the intended parts and free from defects that will weaken a joint or spoil a prominent face.
For the contrasting squares, natural colour differences between timbers or carefully selected veneers often wear better than a surface stained to create contrast. Always test the intended finish on offcuts. Oils, lacquers and hardwax finishes can darken timber considerably and may reduce the difference between two species.
If using sheet material beneath veneer or inlay, select a furniture-grade board with a smooth, stable face. Cut edges should be lipped or otherwise finished properly. Thin iron-on edging and exposed chipboard edges can detract from an otherwise well-made piece.
Build accuracy into every stage
- Prepare stock to a consistent thickness before cutting joints.
- Mark a face side and face edge on each component.
- Use a story stick or full-size rod for repeated measurements.
- Make test joints from offcuts of the same thickness.
- Dry-fit the table before applying glue.
- Measure diagonals on frames and tops; matching diagonals normally indicate a square assembly.
A full dry run can reveal awkward clamp positions, an impractical assembly sequence or a playing surface that sits proud of the surrounding frame.
Let the finish show the joinery
Finishing should protect the table and bring out the timber, not disguise rushed work. Start with sharp cutters and clean machining. Sand enough to remove tool marks and blend surfaces, but avoid rounding over crisp edges or softening the lines of joints.
Remove dust carefully between stages, particularly from corners, open grain and inside edges. Apply finish in thin, controlled coats and follow the manufacturer’s instructions on drying times, sanding and ventilation. Offcuts are the best place to test colour, sheen and application technique.
A low-sheen finish is often forgiving in a piece that will be handled regularly, as minor marks can be less noticeable than on a high-gloss surface. Fit felt pads or suitable adjustable glides beneath the feet to reduce scratching and help the table sit firmly on an uneven floor.
Photograph the finished work before it leaves the workshop. Clear images are valuable for assessment, a portfolio and future entries.
Common mistakes that weaken a strong project
Most disappointing faults can be avoided through planning and patience.
- Ignoring seasonal movement: Wide solid-wood tops need appropriate fixings, such as buttons, figure-eight fasteners or elongated slots where suitable.
- Rushing the chequerboard: Uneven squares, glue marks and sanding through veneer are difficult to conceal.
- Under-sizing the base: Slim legs can look elegant, but need enough timber around joints to remain strong.
- Finishing too soon: Check stability, inspect joints and ease sharp edges before the final coats.
- Making the piece impossible to move: Consider doorways, staircases, vehicle space and any exhibition delivery limits.
- Leaving paperwork until the end: A finished table cannot resolve a missed deadline or an ineligible application.
- Assuming an employer is affiliated: Check the precise organisation named in the entry rules.
Workshop safety still comes first
A deadline is never a reason to work tired or bypass safety measures. Wear appropriate eye and hearing protection when machining, use dust extraction where available, and keep machine guards correctly fitted. Avoid loose sleeves, jewellery and gloves near rotating machinery.
Read the label and safety guidance for adhesives, stains, solvents and finishes. Ensure good ventilation, keep flammable products away from ignition sources and dispose of oily rags as directed by the product manufacturer. Some oils and finishing cloths can present a fire risk if stored carelessly.
Never mix cleaning products, and in particular never mix bleach with acidic cleaners or products containing ammonia. If the table includes lighting, charging points or any mains-powered feature, the electrical work should be planned and completed by a competent person.
If one competition is unavailable, keep the project working for you
Missing out on one competition does not lessen the value of a well-made table. The finished piece can still demonstrate technical ability, persistence and design judgement to employers, tutors and future clients.
Make a concise portfolio record with drawings, material samples, progress photographs and notes on the key joinery decisions. Ask for specific feedback on proportions, construction and finish, rather than simply whether people like the result.
Then look for other ways to show the work: college exhibitions, local craft events, open studios and broader design awards may have different conditions. The long-term benefit is not only a handsome draughts table, but the habit of checking the brief early and making furniture designed to last.














Comments
No comments yet. Be the first to comment!
Leave a Comment